Wide uses the full column for everything, text, diagrams, code, and exercises. Narrow keeps the standard reading width.
Text size
Scales the body text. Headings and code blocks keep their size.
In this section
▾
Splunk Detection and Incident Response: Course Orientation
Module 0
SPLUNK DETECTION AND INCIDENT RESPONSE · MODULE 00
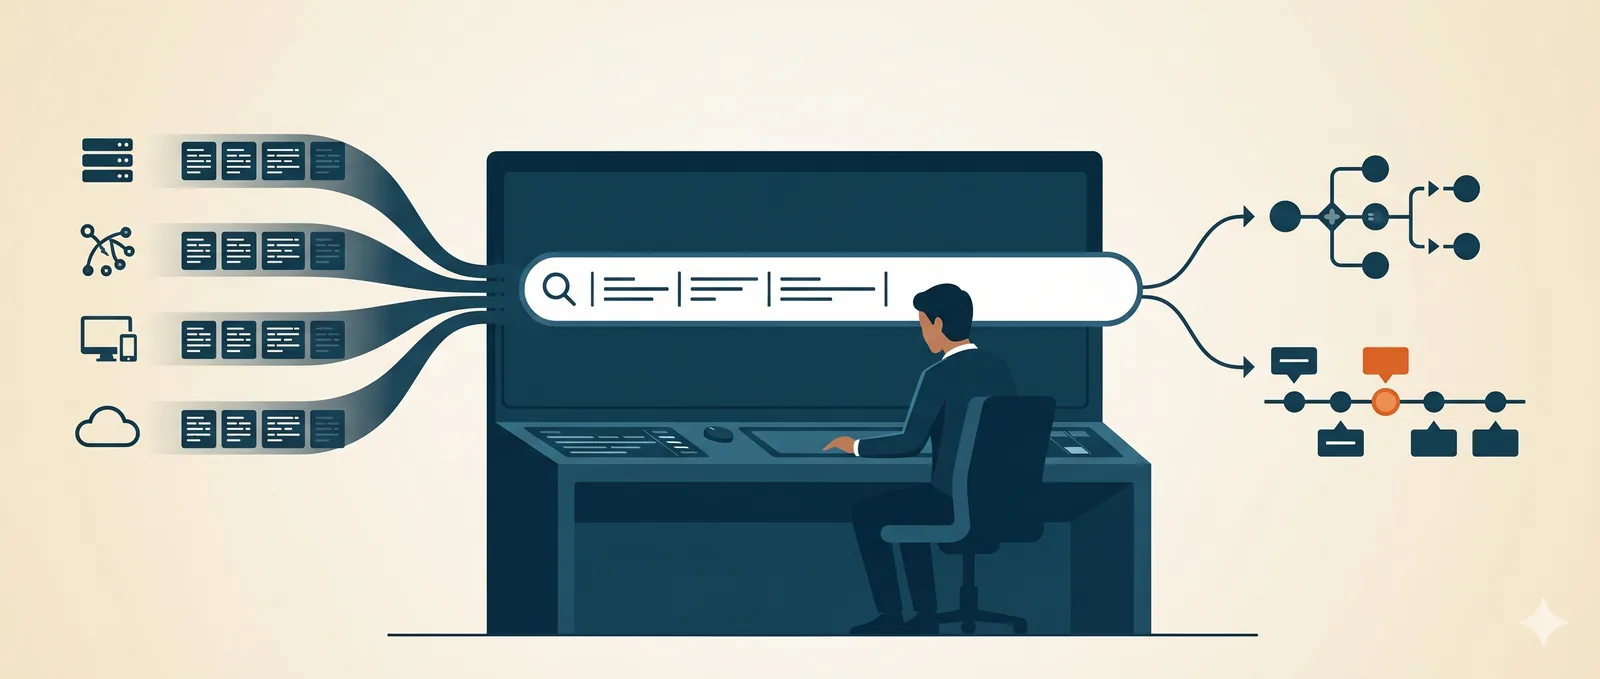
Detect, hunt, and run the incident, all from the search bar.
This course teaches the SPL above beginner level: the searches that turn a Splunk estate into detections that scale, hunts that span the whole environment, and an incident worked end to end. You write tstats over CIM data models, correlate across identity, endpoint, network, and cloud, and run a full investigation. Every search runs on the page against the Northgate Engineering corpus, with no Splunk license and no instance to stand up. This module shows you what you'll be able to do, the surface you'll work, and how the course gets you there.
13 modules
across 6 phases
Runs on the page
no Splunk license needed
tstats + CIM
detection at estate scale
Advanced level
assumes basic SPL
Why this course exists
Most SPL training stops where the real work starts. It teaches you stats, eval, rex, and a basic search, and leaves you there, exactly the level where most practitioners stall. The level above is where detection and incident response actually happen: writing searches that run fast over the whole estate, normalizing wildly different sources so one detection covers them all, and pivoting from a single lead to a fully scoped, reconstructed incident without leaving the search bar.
That level is what this course teaches. A SIEM holds the entire estate, and an attack is a trail across its sources, so the skill that matters is turning that data into detections that scale and investigations that hold up. You write tstats over CIM data models as the detection backbone, hunt hypothesis-first across identity, endpoint, network, and cloud, and run the full incident-response workflow, triage, scoping, timeline reconstruction, and reporting, all as searches. And because every query runs on the page against a real corpus, you are writing and running SPL from the first module, not reading about it.
What you will be able to do
This course is built around the searches you can write and the incidents you can run at the end, not commands you can list. Every module puts real data in front of you and makes you work it on the page.
Write tstats over CIM
Use the accelerated-search backbone, tstats over CIM data models, to write detections that run fast across the whole estate rather than one index.
Engineer scheduled detections
Take a hypothesis to a scheduled correlation search with baselining via eventstats and streamstats, lookup-driven allowlisting, and systematic tuning.
Detect across the estate
Build detections across identity, endpoint, and network, web, and DNS, from impossible travel and spray to LOLBins, beaconing, and DNS tunneling.
Hunt across data models
Run hypothesis-driven hunts with tstats and multi-sourcetype correlation that span identity, endpoint, network, and cloud in one search.
Run the incident
Triage a lead, scope the blast radius across sourcetypes, reconstruct sessions with transaction, and build a defensible incident timeline.
Preserve evidence and report
Preserve evidence from search, drive response actions, write the incident report, and version-control the detections you build.
You also leave with things you keep: a library of tstats-accelerated detections over CIM, hunts that scale across the estate, and a complete capstone investigation of a full attack chain, with its timeline and report.
The analysis surface you will work
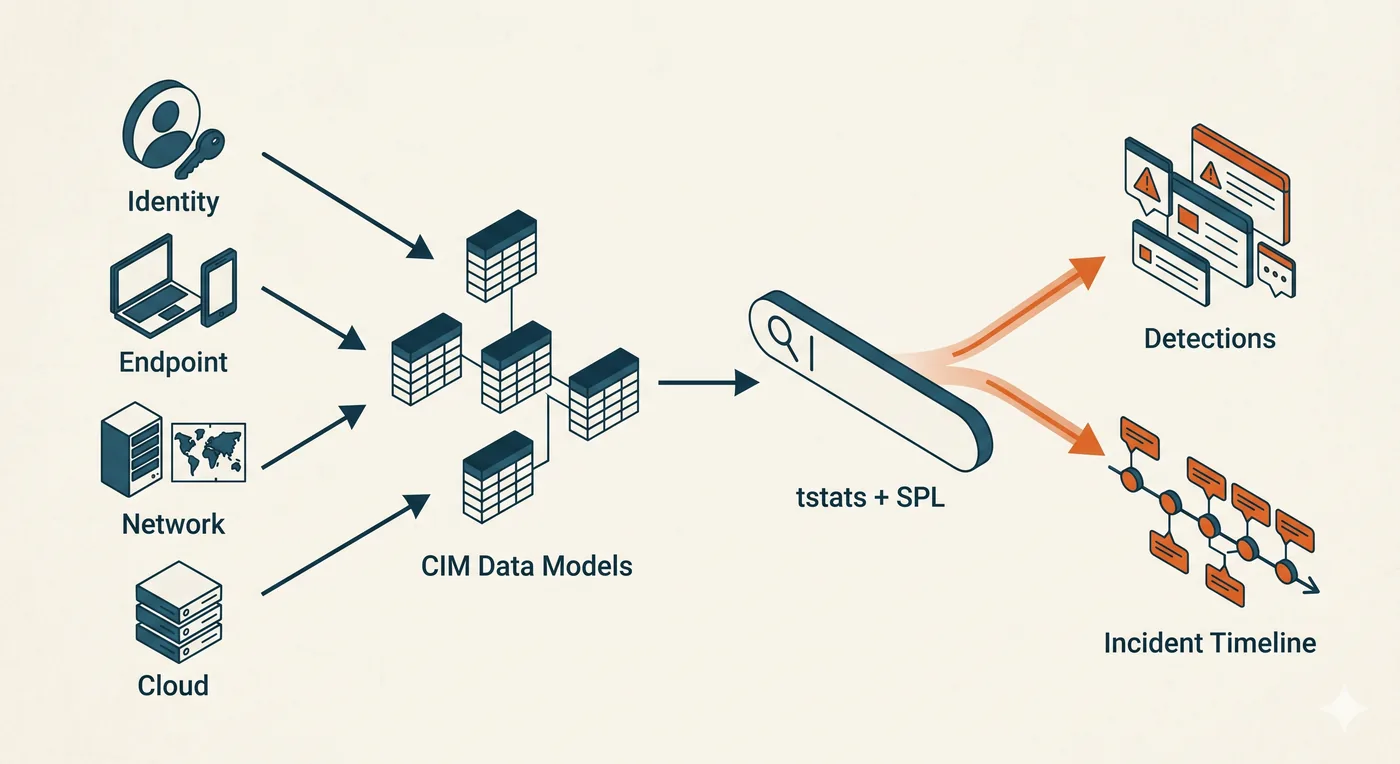
In a search-based SIEM, the wildly different sources of an estate, identity, endpoint, network, and cloud, are normalized into shared CIM data models, and tstats runs accelerated searches across them. That is what lets one detection cover every source and a hunt span the whole environment. Out of those searches come two things: the detections that catch attacks, and the timeline that reconstructs an incident. This course works the full surface, from the raw sources to the finished investigation.
You work this against the Northgate Engineering corpus, the same realistic estate used across the platform, projected into Splunk sourcetypes with its real attack chains buried inside, and you run every search in an SPL engine on the page. There is no license to buy and no instance to maintain. The implementation is Splunk-specific, SPL, CIM, and tstats, but the discipline carries: normalize the data, accelerate the search, correlate across sources, and reconstruct the incident is how detection and response work on any SIEM, and the method maps directly onto query languages like KQL.
How the course is built
Thirteen modules move through six phases. You ground the platform and its advanced search surface, build the detection-engineering craft and a detection library across the estate, move into hunting and correlation, run the full incident-response workflow, and prove all of it in a capstone.
What you need and who this is for
This is a deliberately advanced course, and it is honest about that. It assumes you can already write stats, eval, and rex, extract fields, and run a basic search, and that you have spent time in a SOC or DFIR seat. It does not re-teach beginner SPL. What it teaches is the level above, where detection and incident response actually live. If you are brand new to SPL, build that base first and come back.
Who it is for
SOC analysts, detection engineers, threat hunters, and incident responders who work in Splunk and want the level above beginner SPL, the searches that scale and the incidents you run from them.
Nothing to set up
Every search runs on the page against the NE corpus. No Splunk license, no instance to stand up, nothing to download, you write and run SPL from Module 0.
Transferable discipline
Normalize, accelerate, correlate, reconstruct. SPL and CIM are the implementation; the detection-and-IR discipline maps onto any SIEM, and directly onto query languages like KQL.
Do I already know this material?
Six quick scenarios across the full range of this course, from efficient SPL to scoping an incident in Splunk. Answer them to find out where you sit, and whether this course fits or it will sharpen knowledge you already have.
An SPL search is slow: it runs stats over a huge result set, then filters with a where clause at the very end. What is the biggest improvement?
Add more fields to the stats command.
Filter as early as possible in the base search, by index, sourcetype, time, and key terms, so far fewer events ever reach the stats command.
SPL gets fast when the base search is selective. Constraining index, sourcetype, time, and terms up front means the expensive commands operate on a fraction of the data, which beats filtering after the work is already done.
Remove the stats command.
Run the search more often.
Why does normalizing data to the Common Information Model help detection in Splunk?
It maps fields from different sources to a common schema, so one detection written against CIM fields works across many sourcetypes rather than just one.
Different products name the same thing differently. CIM gives them a shared vocabulary, so a single detection expressed in CIM fields applies to every compliant source, instead of rewriting it per sourcetype.
It reduces the Splunk license cost.
It deletes duplicate events.
It is only useful for dashboards.
You want, per user, the number of distinct source hosts they logged in from. Which SPL is correct?
stats count by user
stats sum(src_host) by user
stats dc(src_host) by user, which counts the distinct hosts per user rather than the total number of events.
count returns events, which over-counts repeated logins from the same host. dc, distinct count, returns the number of unique source hosts per user, which is the question being asked.
dedup user
A detection over an accelerated data model needs to run fast across very large volumes. Which approach fits?
A raw event search using transaction.
tstats against the accelerated data model, which queries the indexed summaries and scales far better than raw event search for this.
tstats reads the data model's accelerated summaries rather than scanning raw events, so it returns results across huge volumes in a fraction of the time, which is exactly what high-volume detection needs.
A subsearch that returns all matching events.
A join across two raw indexes.
Investigating an incident across identity, endpoint, and network sourcetypes, what is the most effective way to reconstruct what happened?
Read each sourcetype separately and guess the order.
Look only at the most recent events.
Trust the first alert and stop there.
Correlate the events by shared entities, the user, host, and address, and order them by time into a single timeline, so the sequence across sources becomes the narrative.
An incident's story lives in the order of events across sources. Pivoting on the shared entities and laying them on one timeline turns scattered logs into a sequence you can read, which is what reconstruction means.
You have confirmed one compromised host. Before responding, how do you scope the incident in Splunk?
Respond to that host and consider it done.
Search only the next hour of data.
Pivot on the indicators, the account, the source address, and the technique, across the data to find every other host or identity they touched, establishing the blast radius before containment.
One confirmed host is rarely the whole incident. Pivoting the known indicators across the data reveals everywhere the attacker reached, so you contain the full footprint at once instead of chasing it host by host.
Restart the indexer.
This course is for you.
You will build detection and incident response in Splunk from SPL and data models through detection engineering, hunting, triage, and full timeline reconstruction.
You have the fundamentals. The value here is the harder half.
You can write efficient SPL, so the payoff is the back half: detection engineering, identity and endpoint and network detection, hunting, scoping, and timeline reconstruction through the capstone.
You handled efficient SPL, CIM, tstats at scale, timeline reconstruction, and scoping, the senior end of the discipline. Take the course to sharpen what you have, close the gaps you did not expect, and turn strong instincts into detection and response you can run at scale.
You are a student of this course now, so start by deciding what you want from it. Are you here to write detections that finally scale across the estate, to hunt across data models, or to run an incident end to end from the search bar? Name that outcome, then turn it into a study plan: which phases matter most to your work, how much time you will give it each week, and what you want to be able to ship by the time you finish.
The rest of Module 0 sets you up to do exactly that. Work through it to see why a SIEM holds the whole estate, how an attack crosses its sources, what detection actually is against the noise, the Northgate environment and where its evidence lives in Splunk, and the on-page toolkit you will run every search in. Then begin Module 1.
Stuck on this lesson?
Your question goes straight to the team and we'll reply by email. Sign in to ask.